Facebook is a fantastic tool for so many bloggers and small businesses. Every day people use it connect with potential customers and build relationships. One of the most popular ways to do that is to share content from your website to Facebook. But Facebook sharing has some… frustrations when it comes to the images it pulls from you site.
By default, Facebook tries to pull your featured image for to share for your blog posts. Sometimes, that doesn’t quite work, and you end up with cutoff text or images.
In the past, you could circumvent which image Facebook grabbed from your site by uploading your own image. However, recently they announced that they’re doing away with this feature to discourage misleading content, titles, or images. If you’re using Business Manager, you can verify your domain name and keep the feature (only for content from your verified domain). But that means you have to continue using Business Manager. And Business Manager is a pain.
Fortunately, if you’re on WordPress, there’s an easy way to specify exactly which image Facebook should grab when sharing a link.
Step 1: Install Yoast SEO

If you aren’t already using Yoast, you probably should be. It’s one of (if not the) most robust SEO plugins for WordPress.
Installing Yoast is easy. You can either go to Dashboard > Plugins > Add New and search for “Yoast”, or just upload the theme .zip file yourself using the Upload Plugin button.
Step 2: Customize Your Facebook Sharing Settings
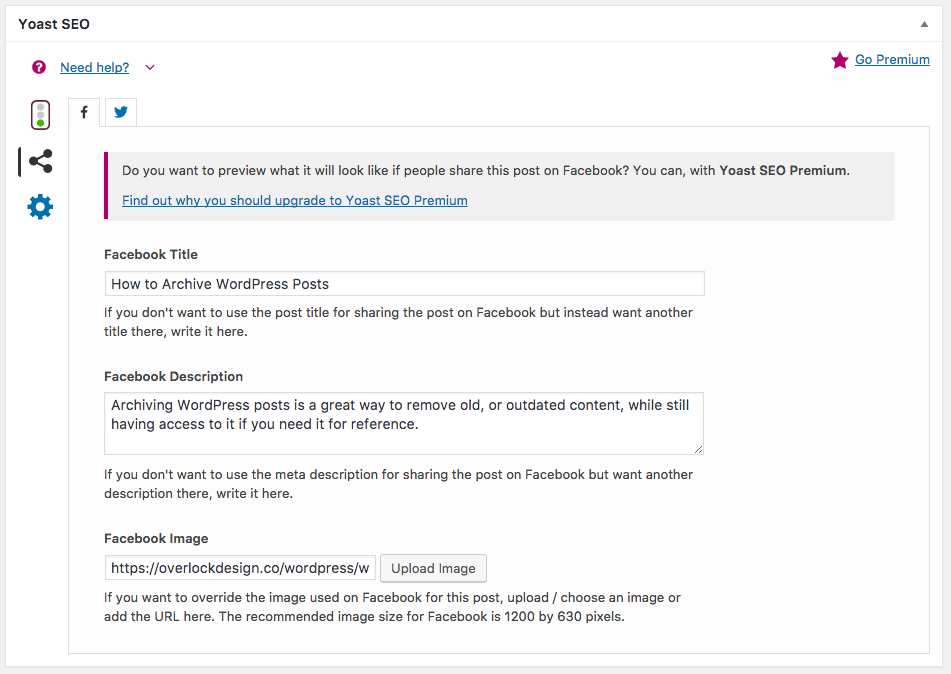
Once you have Yoast installed, you’ll see a new set of options on your Edit/Create Post screen called Yoast SEO. It’s full of features, but the one we’re the most concerned with Social settings. To access them, click the sharing icon in the Yoast box:
The Social settings tab has two sub tabs: Facebook Sharing and Twitter Sharing. These options let you customize how your post gets shared across those social networks.
The Facebook Title field customizes the title that appears when your link is shared. This is great if you want to create a more catchy title for social, but still want the SEO benefits of your (hopefully carefully crafted) title on your website.
Just like the meta description, the Facebook Description box is the lead-in text that’s captured when your post is shared. It’s your “hook”. Make it short, relevant, and eye-catching. (I’m awful at this.)
Finally, the pièce de résistance: the Facebook Image. Here you can upload a picture that’s used specifically when your post is shared on Facebook. This way you can keep your cute, carefully-crafted-to-suit-your-website featured image, but make sure everything shows up right on FB, too.
For your reference: Facebook sharing images should be 1200 x 630 px.
This is what my Facebook sharing settings looks like all filled out:
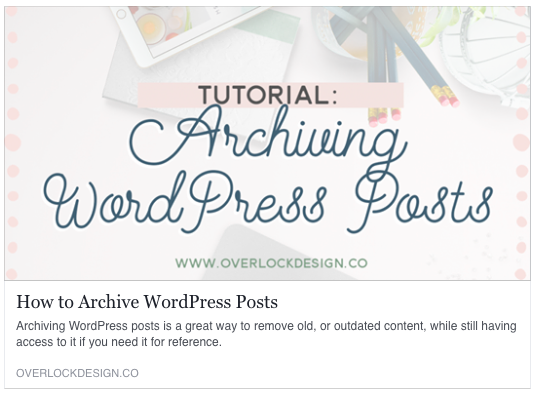
And this is how it renders on Facebook:
Step 3: Debugging (Optional)
Sometimes, even after your fill out your settings, your posts don’t show up right on Facebook. This is because Facebook caches the data it collects from your website when you share a link. If your links aren’t showing up right (wrong image, wrong title, etc.) you might need to go to the Sharing Debugger and “debug” your link.
It’s as easy as pasting the URL into the box and clicking Debug. When it pops up, you’ll get a screen of everything Facebook pulls when you share your link, along with a preview of your link.
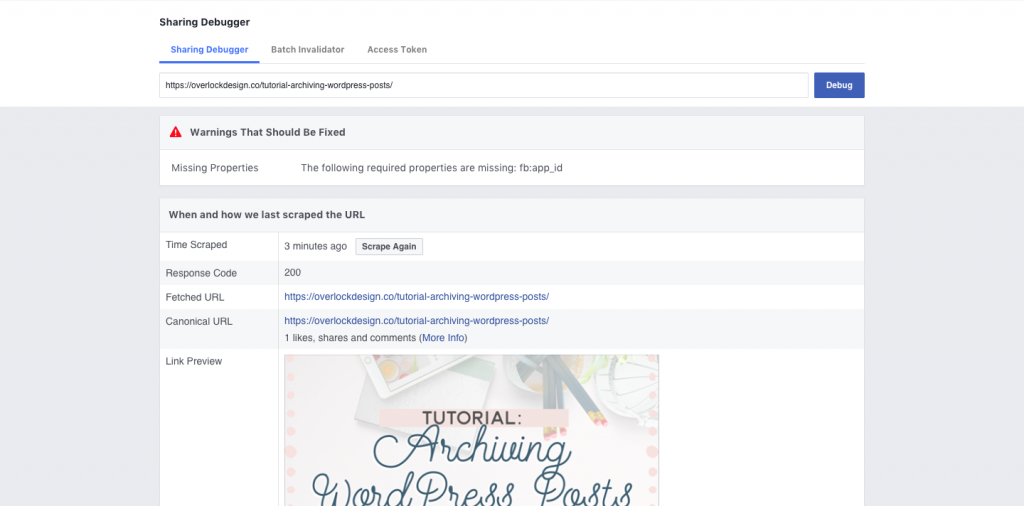
If your preview doesn’t look right, just click Scrape Again under Time Scraped to have Facebook re-crawl your website. Just keep re-scraping until it looks right.
Step 4: Celebrate
Now you can customize how your links show up on Facebook! No more worrying about it showing up wrong when you (or anyone else!) shares your content.

Leave a Reply